Simple Solutions for Common Furnace Problems
When your furnace acts up, it can be tempting to call a technician immediately, but have you considered that some issues might have simple fixes? You could start by checking if the thermostat is set correctly or if the air filters need replacing. These straightforward steps can solve problems without much hassle. But what if the issue isn’t as simple as it seems? Before you reach for the phone, let’s explore other quick solutions that might save you time and money. Understanding these common furnace problems could be your first step toward a warmer, more efficient home.
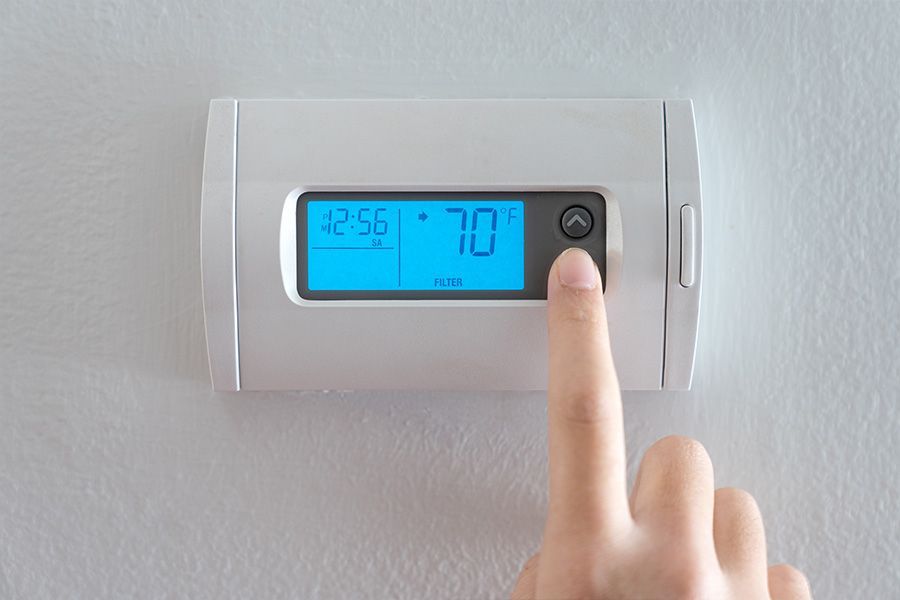
Thermostat Troubleshooting
Diagnosing thermostat issues involves checking for incorrect settings, unresponsive displays, or faulty wiring to guarantee efficient furnace operation. Begin by confirming that the thermostat is set to ‘heat’ mode and that the setting is above room temperature. This guarantees the furnace receives the correct signal to activate. If the display is unresponsive, replace the batteries and verify the screen is operational. Check for any error codes that might indicate specific issues needing attention.
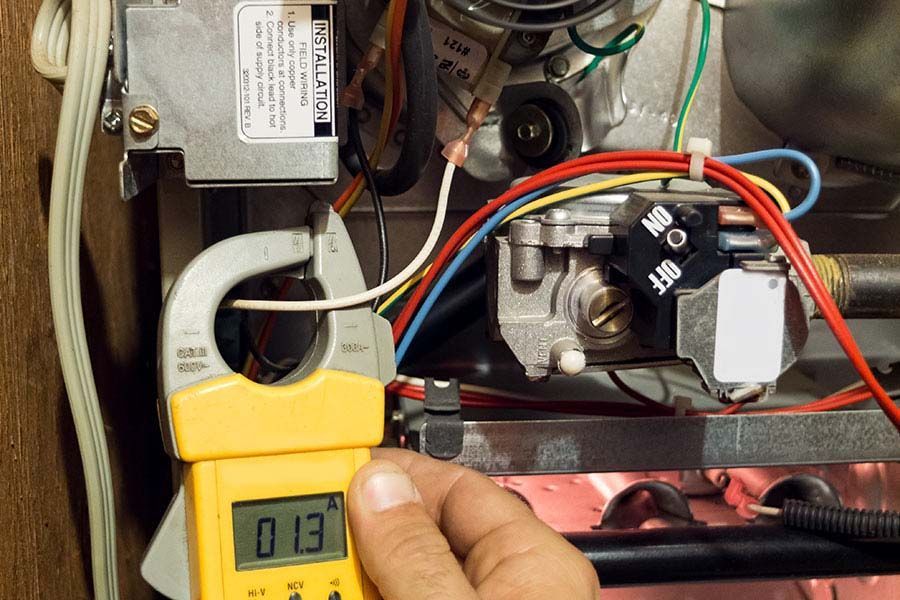
Next, inspect the wiring connections. Turn off the system's power before removing the thermostat cover. Look for loose or corroded wires, which can disrupt communication between the thermostat and the furnace. Using a multimeter, test the voltage to confirm that the thermostat receives the necessary power. If there’s no voltage, it may indicate a blown fuse or tripped circuit breaker.
Additionally, confirm the thermostat is level on the wall, as a tilted position can affect its internal components. Clean the thermostat by gently dusting it, removing any debris that might interfere with its sensors. These steps help maintain accurate temperature control, confirm comfort and efficiency, and ultimately allow you to serve others needing a warm home.
Changing Air Filters
Regularly changing your furnace’s air filters is essential for maintaining ideal airflow and preventing dust buildup. Neglecting this task can lead to inefficient heating, increased energy consumption, and even potential damage to your furnace. To guarantee your furnace operates effectively, follow these steps to change your air filters:
- Identify the correct filter size: Check your furnace’s manual or the existing filter for size specifications. Using the wrong size can reduce efficiency and allow dust to bypass the filter.
- Turn off the furnace: Before removing the old filter, switch off the furnace to prevent dust from circulating during the change. This guarantees safety and cleanliness.
- Remove and inspect the old filter: Slide out the old filter and check its condition. A dirty, clogged filter confirms the need for replacement. Regular inspections can help you determine how often changes are necessary.
- Install the new filter: Insert it, ensuring it aligns with the airflow direction arrows indicated on the filter frame. Proper installation maximizes the filter’s effectiveness in trapping dust and debris.
Pilot Light Issues
If your furnace’s pilot light frequently goes out or won’t stay lit, this could indicate issues with the thermocouple or gas valve that require immediate attention. The thermocouple is a safety device that senses whether the pilot light is on by detecting heat. If malfunctioning, it might shut off the gas supply, extinguishing the pilot light. First, verify the thermocouple is securely positioned near the flame to address this. It should look clean and straight, without any visible cracks or dirt. If it’s dirty, gently clean it with a fine sandpaper or emery cloth.
Next, examine the gas valve, which controls the gas flow to the pilot light. Confirm it’s fully turned to the ‘Pilot’ position. If the valve is faulty, it might not regulate gas properly, causing the pilot light to go out. You can test the valve by trying to relight the pilot. If it doesn’t stay lit, the valve may need replacement.
Inspecting Furnace Blower
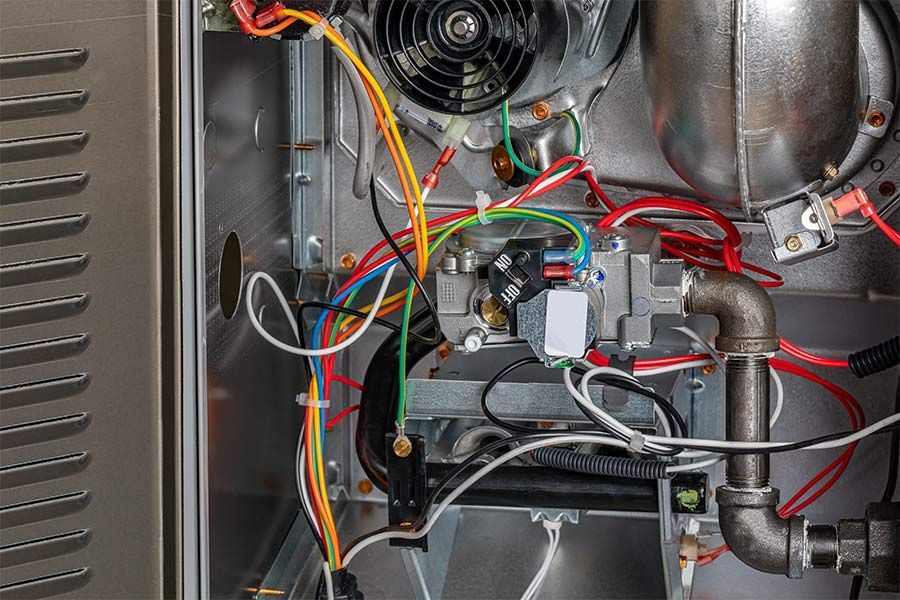
While guaranteeing the pilot light functions properly, inspecting the furnace blower for signs of wear or malfunction is essential to maintain efficient heating. The blower is essential in circulating warm air throughout your home, so keeping it in good condition is imperative. Here’s how you can inspect the furnace blower effectively:
- Turn Off Power: Before inspecting, verify the furnace is off. This prevents accidents and protects you from electrical hazards. Locate the power switch on the furnace or shut off the circuit breaker.
- Inspect and Clean Blades: Check the blower blades for dust and debris buildup, which can hinder performance. Use a soft brush or vacuum to clean them thoroughly.
- Check Belt Tension: If your blower uses a belt, inspect it for signs of wear or damage. A loose or frayed belt can reduce efficiency and should be replaced promptly. Verify it’s tight enough to avoid slippage but not overly tight to prevent strain.
- Listen for Unusual Noises: Turn the furnace back on and listen for any unusual noises, such as grinding or squealing, which may indicate mechanical issues. Address these promptly to prevent further damage.
Regularly inspecting your furnace blower guarantees reliable and efficient heating, allowing you to serve others effectively by maintaining a comfortable environment.
Checking Furnace Switch
Ensure your furnace switch is functioning correctly by locating it near the furnace and verifying it’s in the ‘on’ position. This switch resembles a regular light switch and may be mounted on a wall or ceiling. It’s essential to confirm the switch hasn’t been accidentally turned off, which could cause your furnace to stop working unexpectedly.
Once you’ve verified the switch is on, listen for any sounds indicating the furnace’s activation. If silence persists, consider checking the switch for damages or loose connections. Inspect the wires leading to and from the switch for signs of wear or fraying, which could disrupt the electrical flow. Tighten any loose screws to guarantee a stable connection, using a screwdriver if necessary.
While inspecting, confirm the surrounding area is clear of obstructions. Objects resting against the switch can inadvertently turn it off, disrupting the furnace’s operation. You might need to replace the switch if you identify any physical damage or persistent issues despite your adjustments. In such cases, prioritize safety by turning off the power supply to the furnace before proceeding with any replacements. Your attention to detail helps maintain a reliable heating system, serving others by guaranteeing comfort and safety.
Resetting Circuit Breaker
After verifying the furnace switch is operational, the next step involves checking and potentially resetting the circuit breaker to restore power to the furnace. Begin by locating your home’s electrical panel, typically found in the basement, garage, or utility room. Circuit breakers are designed to trip when they detect an overload or short circuit, cutting power to prevent damage or fire.
Here’s how to reset the circuit breaker:
- Identify the Tripped Breaker: Look for a breaker switch that’s not aligned with the rest. It may appear halfway between ‘on’ and ‘off’ positions.
- Turn the Breaker Off: Push the switch to the ‘off’ position. This guarantees the breaker resets properly.
- Switch the Breaker On: Firmly push the switch back to the ‘on’ position. You should feel it click into place.
- Test the Furnace: Return to your furnace and check if it powers on. If the breaker trips again, an underlying issue could require professional assistance.
Clearing Blocked Vents
Blocked vents can impede airflow and reduce furnace efficiency, so ensure all vents are clear of obstructions like furniture or debris. Start by inspecting each vent in your home. Move any furniture, rugs, or objects that might block the airflow. Keep a few inches of clearance around each vent to guarantee proper circulation. This simple step can significantly improve your furnace’s performance and help maintain a comfortable environment.
Next, check for dust accumulation. Use a vacuum cleaner with a hose attachment to remove dust or pet hair from the vent covers. If the vent covers are filthy, remove them and wash them with mild soap and water. Be sure they are completely dry before reattaching them.
In addition, examine the ductwork for leaks or blockages. Accessing ducts might require professional help, but you can inspect visible areas for apparent issues. If you find any, sealing them with duct tape or a specialized sealant can prevent air loss.
Examining Ignition System
Routinely inspect your furnace’s ignition system, as any malfunction can prevent the furnace from starting or operating effectively. The ignition system is essential for lighting the burners, and a fault could leave those you serve without heat. Here’s how you can verify it’s functioning correctly:
- Check the Pilot Light or Igniter: If your furnace has a pilot light, confirm it’s lit. For electric igniters, inspect for cracks or wear that might impede their function.
- Clean Ignition Components: Dust and debris can obstruct the ignition process. To maintain peak performance, gently clean the pilot light or igniter with a soft brush or compressed air.
- Inspect the Gas Supply: Verify that the gas valve is open and supplying fuel to the ignition system. A closed valve or blocked line can prevent ignition.
- Test the Ignition Control Module: This component regulates the ignition sequence. Use a multimeter to test for proper voltage. If it’s faulty, replace it to restore operational effectiveness.
Addressing Strange Noises
While guaranteeing the ignition system is in top condition, you might also notice strange noises from your furnace that indicate underlying issues needing immediate attention. These noises can range from banging and clanking to whistling and rattling, each suggesting a different problem. A banging sound often signals delayed ignition or expanding and contracting ductwork. When you hear a high-pitched whistling, check for air leaks or a dirty filter restricting airflow.
If your furnace rattles, loose panels or screws might be the culprits. Tighten all accessible components to eliminate this issue. Additionally, any grinding or scraping noises could indicate worn-out motor bearings, requiring professional maintenance to prevent further damage.
Addressing these noises promptly extends the furnace’s lifespan and guarantees safety and efficiency. By taking action, you prevent minor issues from escalating into expensive repairs. Always prioritize safety; disconnect power before attempting any DIY solutions. For complex problems or persistent noises, contact a certified technician. They’re equipped to diagnose and resolve specific issues, guaranteeing your furnace operates smoothly. Remember, maintaining a quiet furnace is essential for creating a comfortable and safe environment for those you serve.
Ensuring Proper Ventilation
Proper ventilation guarantees that your furnace operates efficiently and prevents dangerous carbon monoxide and other harmful gases from building up. Making sure your furnace is properly ventilated is essential not just for performance but also for safety. Here’s how you can achieve ideal ventilation:
- Inspect Vent Pipes Regularly: Check for any obstructions or damage in the vent pipes. Blockages can cause improper exhaust, leading to gas buildup. Make it a routine to inspect and clean these pipes.
- Maintain Clearances: Confirm there’s enough space around the furnace for the air to circulate freely. This prevents overheating and allows for efficient combustion, crucial for the unit’s operation and safety.
- Use Carbon Monoxide Detectors: Place these detectors near your furnace to monitor gas leaks. They’ll alert you to potential problems before they become dangerous, ensuring you can resolve them quickly.
- Verify Proper Exhaust Venting: Verify that exhaust vents lead outside and are unobstructed. Properly sealed and insulated vents prevent leaks and maintain efficient airflow, reducing the risk of harmful gas accumulation.
Conclusion
You’re like a modern-day Sherlock, deducing your way to a cozy home by addressing these common furnace hiccups. Verify your thermostat’s set right, swap those filters, and keep an eye on the pilot light. Check the blower and the furnace switch, clear vents, and listen for odd noises. Just as Watson’s insights aided Holmes, these steps will help you maintain peak performance and efficiency, preventing costly repairs and guaranteeing warmth all winter.
Furnace Operation FAQs
How Often Should I Schedule Professional Furnace Maintenance?
You should schedule professional furnace maintenance annually. Doing so guarantees peak performance, enhances safety, and extends your furnace’s lifespan. Regular maintenance allows you to serve others by keeping their environments warm, safe, and comfortable.
What Are the Signs of a Failing Heat Exchanger?
You should watch for signs like soot buildup, unusual noises, or carbon monoxide presence. A cracked heat exchanger often reduces efficiency. Guarantee regular inspections to prevent hazards and maintain safe, effective heating for those you serve.
Can a Dirty Furnace Impact Indoor Air Quality?
Yes, a dirty furnace can impact indoor air quality. Dust and debris circulate through your home, affecting those with allergies. Regular maintenance guarantees clean air, promoting comfort and health for everyone. Prioritize servicing to foster a healthier environment.
How Can I Improve Furnace Energy Efficiency?
Think of your furnace as a well-tuned orchestra. Regularly replace filters, seal ducts, and schedule annual maintenance. This harmony guarantees peak energy efficiency, reducing waste and costs, ultimately benefiting your home and the environment.
What Should I Do if My Furnace Is Cycling on and off Too Frequently?
Check your thermostat settings first, ensuring they’re correct. Clean or replace the air filters to improve airflow. Inspect and clear any blockages in vents. If issues persist, consult a professional to examine the system thoroughly.